In January there was my friend Katherine's birthday. She is my running partner, very important at the moment as I don't seem to find the will to run by myself. It is pretty cold outside.
Our other friend Helen made her a felted bag. She is very clever, made it without a seam. That's something I would like to learn.
I thought I would make something to go with the bag, and here we are.
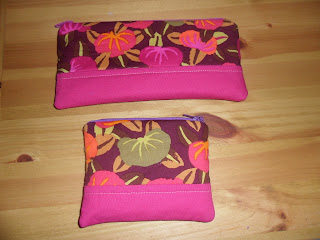
I wanted my cases to be 5 1/2" by 4 1/2" for the smaller one, and 8 1/2" by 4 1/2" for the bigger one ( that's including the seam allowances), which can take pencils. So here are my sizes :
Small case bottom pink cut 2" by 5 1/2", top fabric 3" by 5 1/2".
Bigger case bottom pink cut 2" by 8 1/2", top fabric 3" by 8 1/2"
You need 2 panels per case, and the lining is cut in one piece for each panel. Same with the wadding, 2 pieces per case. I chose some synthetic one, very light. Sew the top and bottom fabric together for each case.
I quilted the front panel with one seam 1/4" under the separation between the 2 fabrics. Quilt as you like.
My first step was to sew the zips to the lining. I do a small seam allowance, and a normal one when I attach the main panel. It hides the first seam.
This photo shows the way the zip is.
Now I have attached the front panel on both sides of the zip. Make sure you can operate the pull, that it doesn't catch the fabric.
To finish the case, open the zip halfway at least, and pin the parts as on the photo, the 2 linings together and the 2 fronts together, right sides facing. Sew all the way around. Don't forget to leave a gap at the bottom of the lining to turn everything out.

I thin the wadding out with scissors to limit the bulk in the seams.
And I cut the corners so they are neater when turned.
Now turn your case inside out, slip stitch the gap at the bottom and Voila, a beautiful case, like you can't find them in the shops.
The small one is a great size to take all the cards you have from coffee shops and the like. It takes less space than having them on display.
Have a great time sewing.
Pascale.


